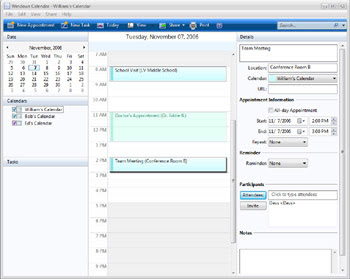
Collaborating with Calendars


Introduction


Outlook 2010 makes it easy to share your schedule and availability, a feature commonly used in the workplace to collaborate and arrange meetings.
In this lesson, you'll learn how to share your calendar and schedule meetings in an office environment. We'll also talk about using Schedule view to find the best possible time for group meetings and how to set your availability.

You must be connected to a Microsoft Exchange Server in order to use the features discussed in this lesson. If you are using Outlook 2010 on your home computer, you won't be able to use the calendar sharing and meeting features available to those using Outlook in the workplace.

Sharing Calendars

In order to schedule meetings with other people in your workplace, your calendar must first be shared. Keep in mind that sharing can vary depending on your office's network and your IT department may have already set your calendar sharing settings.

To Share a Calendar:

  • From the Home tab, locate and select the Share Calendar command on the Ribbon. The Sharing invitation dialog box will appear.
Click the buttons in the interactive below to learn more about different calendar sharing options. 
After you've shared a calendar, you can edit your shared calendar settings by changing your calendar permissions. Just click the Calendar Permissions command on the Ribbon.

To Open a Shared Calendar:

Whenever someone shares a calendar, you will need to open that calendar to view its details.
  1. Locate and select the Open Calendar command on the Ribbon and then choose Open Shared Calendar... from the drop-down menu.
  2. The Open a Shared Calendar dialog box will appear. Click the Name... button to choose a shared calendar from your address book.
  3. The address book will appear. Choose the contact whose shared calendar you want to view, then click OK.
  4. Click OK to continue.
  5. The shared calendar will appear in the View pane. Click the checkbox in the Navigation pane to toggle the calendar on and off.

Scheduling Meetings

Once your calendar is shared with other users in your workplace, you can use your shared calendars to schedule meetings.

To Send a Meeting Request:

A meeting is just like an appointment on your calendar, but with other attendees. To schedule a meeting, you must first send a meeting request.
  1. Locate and select the New Meeting command on the Ribbon.
  2. The New Meeting dialog box will appear. Whenever you request a meeting, you'll actually be sending an email message to the attendees. Enter attendees for the meeting into the To: field as you would enter recipients in the Compose window of an email.
  3. Enter the information for the meeting. At the very least, you should include a subject, time, and location. You can also include a message as you would in an email.
  4. When you've finished entering meeting information, click Send.
  5. The meeting request will be sent to the selected attendees and the meeting will appear on your calendar. When your attendees accept the meeting request, the meeting will appear on their calendars as well.

To Accept a Meeting Request:

When someone wants to schedule a meeting with you, you will receive a meeting request as an email message.
  1. Navigate to Mail view. Locate and select the meeting request.
  2. Click Accept at the top of the message, and then choose your desired option from the drop-down menu. You can choose to either edit your reply or simply accept the meeting.
  3. The meeting will be added to your calendar.
You can also request to reschedule a meeting directly from a meeting request. Just click Propose New Time and then select the desired option from the drop-down menu. The New Meeting dialog box will appear, allowing you to propose a new time to all meeting attendees.

Using Schedule View

If you need to schedule a meeting with a lot of people, it can be difficult to find a time that's best for everyone. Schedule view allows you to see a simplified version of your shared calendars, which makes it easy to find the perfect time for your next meeting.
  • To access Schedule view, locate and select the Schedule view command on the Ribbon. Schedule view will appear, allowing you to see free and busy times for each of your shared calendars. Look for shared free time when scheduling a meeting.

Setting Availability

By default, any scheduled appointments and meetings will appear as busy time in Schedule view, while all other time will appear as free. However, if you keep an especially busy schedule, you may wish to set additional free and busy times. For example, you may wish to set certain hours as busy to put aside time for your own work. Alternatively, you may wish to set certain hours as free if you want people to know that you're available.
  • To set your availability, create a new appointment and then click the Show As drop-down button to set your availability as either Free, Tentative, Busy, or Out of Office.

Challenge!

  1. Share your calendar with someone else.
  2. Open a shared calendar.
  3. Click the New Meeting command and explore the meeting request options.
  4. Use schedule view to view two or more shared calendars.

Managing Your Calendars


Introduction


Outlook 2010 includes powerful scheduling features in Calendar view. From there, you can create appointments and manage your time.
In this lesson, you'll learn how to schedule appointments and create multiple calendars. We'll also talk about how to organize your schedule, including how to apply categories, reminders, and more.

Calendar View

Calendar view makes it easy to schedule appointments and keep track of important dates, just like a desk calendar. But unlike a physical calendar, Calendar view allows you to quickly edit and rearrange your schedule whenever you want. While most frequently used in the workplace, Calendar view can also be helpful for managing a busy personal schedule on your home computer.
  • To access Calendar view, locate and select the Calendar View tab in the lower-left corner of the screen. Calendar view will appear.
Click New Appointment to create a new appointment on your calendar. You'll be able set the time, location, reminder options, and much more.
Click New Meeting to schedule a meeting with other people.
Use the commands in the Go To Group to jump to your Daily and Weekly Calendar.
You can choose a variety of view options for your calendar, including a daily, weekly, or monthly summary of your upcoming appointments and meetings.
Schedule view allows you to view multiple schedules from shared calendars at the same time, making it easy to schedule group meetings.
The commands in the Manage Calendars group allow you to open shared calendars from your contacts list and create new group calendars.
The commands in the Share Calendar group allow you to share your calendar with others and modify calendar permissions.
Click any date in the Quick view calendar to see it in the View pane.
Click the arrows to move between months.
Your calendars will appear in the Navigation pane. Click the checkbox to show or hide your calendars.
Any calendars that are shared with you will appear below your personal calendars. Click the checkbox to show or hide your shared calendars.
Appointments appear on your calendar as they are added. Simply double-click to edit appointment information, like time or location.
Upcoming meetings appear on your calendar just like appointments. Meetings will appear on everyone's calendar who has accepted the meeting request.
Meetings are distinguished from appointments by the dashed line on the left.

To Create an Appointment:

Whenever you schedule a new appointment, it's easy to add it to your calendar.
  1. Locate and select the New Appointment command on the Ribbon.
  2. The New Appointment dialog box will appear. Enter the desired information for the appointment. At the very least, you should include a subject, time, and location but you can also include lots of other information, such as reminder preferences, detailed notes, and more.
  3. When you are done entering the appointment information, click Save & Close.
  4. The appointment will be saved and added to your calendar.
You can also schedule a new appointment by selecting the desired time on your calendar. The New Appointment dialog box will appear with the selected time.
If you have a standing appointment—for example, a weekly staff meeting or lunch date every Wednesday—you can create a recurring appointment that will appear on your calendar automatically. Simply click the Recurrence command when scheduling an appointment and then choose how frequently the appointment should be scheduled.

Using Multiple Calendars

If you keep a lot of different appointments, you can use multiple calendars to help organize your schedules. For example, you might use one calendar to keep track of your personal tasks and another to manage upcoming meetings with clients.

To Create a New Calendar:

  1. Click the Folder tab on the Ribbon, then click the New Calendar command.
  2. The Create New Folder dialog box will appear. Enter a name for the new calendar, make sure Calendar is selected, then click OK.
  3. The new calendar will appear in the View pane. Click the checkbox in the Navigation pane to toggle the calendar on and off.

Doing More with Calendars

Once you're familiar with the basics of Calendar view, you can start taking advantage of its most helpful features with these additional tips.

To Apply Categories to Appointments:

If you schedule a lot of different appointments, you can keep them organized by applying categories, just like email messages. If you've already customized categories to manage email messages (see Lesson 3), you'll be able to apply those same categories to your appointments.
  • To apply a category, select the desired appointment and then click the Categorize command on the Ribbon.

To Create Multiple-Day Appointments:

If you have an appointment that will span multiple days, such as a vacation or conference, you can schedule the appointment to extend across multiple days on your calendar.
  1. When creating the appointment, set the Start and End time for the full length of the appointment.
  2. The appointment will appear on your calendar across multiple days.

To Create Appointment Reminders:

You can create reminders for your most important appointments, which can be especially helpful if you keep a busy schedule. For example, you might schedule a reminder for an important lunch date that would appear thirty minutes before the appointment.
    1. To create a reminder, simply set a reminder time on the Ribbon when creating a new appointment.
    2. The reminder will appear in a pop-up dialog box at the scheduled time.

To Print Calendars:

If you need to reference your schedule on the go, it's easy to print your calendars.
    1. Click the File tab on the Ribbon.
    2. Backstage view will appear. Locate and select Print.
    3. The Print pane will appear. Choose your desired layout, including daily, weekly, and monthly summaries of your appointments and meetings, then click Print.

Challenge!

  1. Navigate to Calendar view.
  2. Create a new appointment and set a reminder for thirty minutes before the appointment.
  3. Create a new calendar.
  4. Apply a category to an appointment.

Outlook 2010 Managing Contacts Lacture No.4


Managing Contacts

Introduction

Contacts view is the central place for all your contacts in Outlook 2010. Maintaining a detailed contacts list will make sending emails and scheduling meetings that much easier.
In this lesson, you'll learn how to add, manage, and organize your contacts. We'll also talk about how to import contacts.
Outlook 2010 keeps all of your contacts organized in Contacts view. Once you've added contacts to Outlook, you'll use the same contact information to send emails, schedule meetings, and assign tasks. Keeping a detailed contacts list can be especially helpful in the workplace, as you may need to communicate with a lot of different people every day.
  • To access Contacts view, locate and select the Contacts View tab in the lower-left corner of the screen. Contacts view will appear.
·         Click the New Contact command to create a new contact. The Contact dialog box will appear. From here, you'll enter the desired contact information.
·         If you frequently work with the same group of people, you can create a contact group for quick access.
·         The Delete command will delete the currently selected contact from the contacts list.
·         Use the commands in the Communicate group to quickly compose an email or request a meeting with the selected contact.
·         There are several different view options for Contacts view. By default, your contacts appear as business cards, but you can also view them in small card, phonebook, or list format.
·         The commands in the Actions group allow you to access advanced options, such as Mail merge.
·         It's easy to share contact information with someone else. For example, if a co-worker requested an email address of a new client, you could forward their contact information.
·         Open the Address Book to see a full list of your contacts. You can also navigate between other address books available over your network.
·         If you're having trouble finding a contact, you can find them quickly using the Search bar.

Adding Contacts

There are two ways to add contacts:
  • Manually entering information for each of your contacts.
  • Importing existing lists of contacts from other accounts, like Gmail or Hotmail. If you already have a lot of contacts saved with another account, this method can save you a lot of time and effort.

To Add a New Contact Manually:

  1. From Contacts view, locate and select the New Contact command on the Ribbon.
  2. The Contact dialog box will appear.
  3. Enter the contact information. At the very least, you should enter a first and last name, as well as an email address. However, you can also enter other information, like phone numbers, alternate email addresses, and more.
  4. When you are finished filling out the contact information, click Save & Close.
  5. The contact will be added to your contacts list.

To Import Contacts:

In order to import contacts to Outlook, you must first export those contacts to a file, most commonly a Comma Separated Value file, also known as CSV. Most email applications will provide instructions on how to export your existing contacts. Once you've exported your contacts, you're ready to import them to Outlook.
  1. Click the File tab on the Ribbon.
  2. Backstage view will appear. Select Open.
  3. The Open options will appear. Select Import.
  4. The Import and Export Wizard will appear. Follow the instructions to import contacts into Outlook.

Doing More with Contacts

Once you're familiar with the basics of Contacts view, you can start taking advantage of its most helpful features with these additional tips.

To Send an Email to Contact Groups:

Contact groups are especially convenient for sending messages to a group of people, such as a specific team in your workplace.
  1. Select the desired contact group and then click the E-mail command on the Ribbon.
  2. The Compose window will appear and the contact group will be copied into the To: field. The message will be sent to everyone in the contact group.

To Assign Tasks:

If you want to use Outlook 2010 to manage projects and tasks, you can assign tasks (also known as To-Do's) to your contacts. Your contact will receive a notification about the task and you'll be notified when the task is completed.
  1. Click the desired contact, locate and select the More command on the Ribbon and then select Assign Task from the drop-down window.
  2. The Task window will appear. Enter a subject as you would for an email message, as well as a due date for the task.
  3. When you're finished entering information about the task, click Send.

To Print Contacts:

If you need to access your contacts list away from your computer, it's easy to print contacts.
  1. Click the File tab on the Ribbon.
  2. Backstage view will appear. Locate and select Print.
  3. The Print pane will appear. Choose your desired layout, including business card, phone list, and more, then click Print.

Challenge!

  1. Navigate to Contacts view.
  2. Add a new contact to your contacts list.
  3. Create a contact group.
  4. Address a new email message to one of your contacts.